Friday, September 30, 2011

Basic Fusing III

2 comments
Putting it all together.
Once I have all my design elements cut out and ready to assemble I will begin to fuse things in place.
Remember we put our background fabric that had fusible all over it on the back of the fabric back on a piece of release paper? Now since it is sitting on the paper I can fuse things to the front of it.
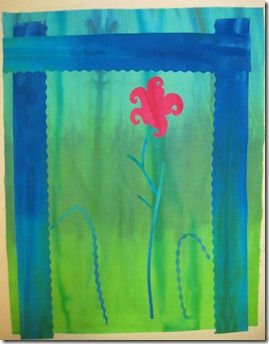
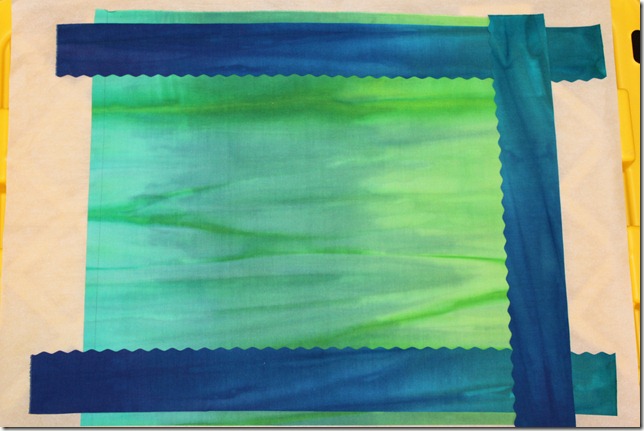
The first thing I do is to put three of the border strips on the edge. I use the pencil line that I first drew as my mark to line up the strips of fused fabric. I only want to add in the two sides and top because I will cover all the stems with the bottom strip when I am done arranging them.
IMG_1771
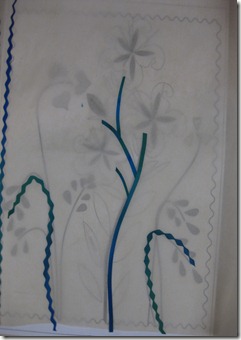
Before I begin to put the design elements in place I can create nice curves on top of a piece of release paper right over my pattern. This way the curves have a memory to them so when I put them on the fabric and fuse them down it is very easy to do.
IMG_1274IMG_1277
TIP- As I add in design elements I want to make sure I keep the bottom of my iron clean.
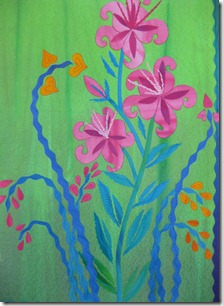
Before I fuse anything in place, I make sure that I like the arrangement and that I have room for everything. So I will place all of the green leaves down and fuse them before I fuse the rest of the vines on the sides.
IMG_1282
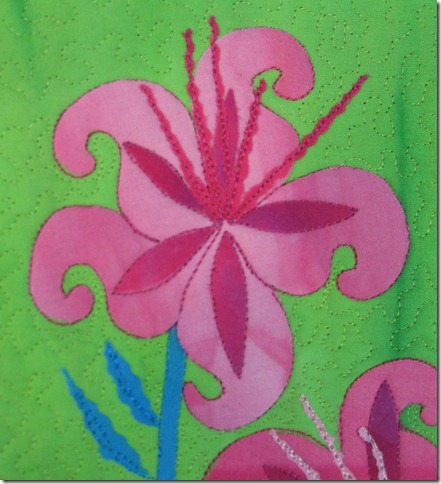
I will then fuse everything EXCEPT the little details in the center of the big Star Lilies. I will machine quilt everything first and then add those in at the end so that I can very easily quilt around the shape of the Star Lily.
IMG_1281I like to stitch in the ditch right next to not on top of most of my designs like the stems and flowers. I like to do this in 30# rayon thread.
Once I have quilted all the design elements then I quilt the background. In the case of Star Lilies I stippled this with silk thread matching the background color.
After I have done all the back ground then I will do the border.
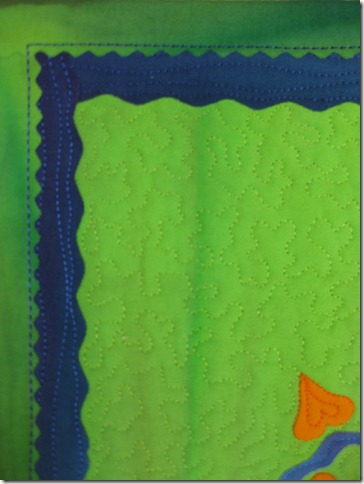
IMG_1284
I did the border with the 30# rayon thread with a straight stitch just wiggling it as I stitched it.
Finally I squared up my quilt and added a sleeve to it and a fused binding.
I hope you enjoyed this tutorial on basic fusing. Please share it with a friend and think about having me come to your group to teach you even more fun fusing tips.
Remember if you aren’t having fun, don’t do it!!!

Thursday, September 29, 2011

Fabric to Dye For

0 comments
See how much fun Linda Tuefel and her friend Vicki had dyeing with my book, Fabric to Dye For, Linda blogged about it.

Wednesday, September 28, 2011

Basic Fusing II Star Lilies

1 comments

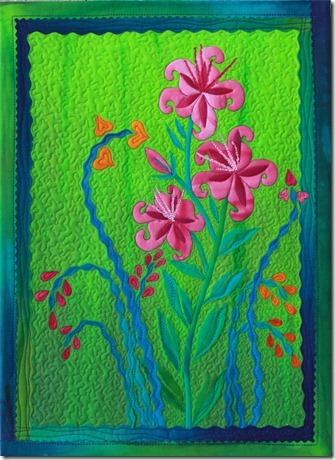
Let’s get started with our project my pattern Star Lilies”.

Star Lilies was inspired by the Star Lilies in my garden. I love them and they come in such bright and wonderful colors unlike regular day Lilies that I also have in my garden.
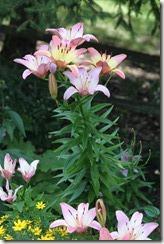
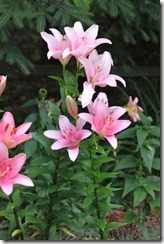
IMG_0374-1_thumbIMG_0372_thumb

starlillies_thumb1

Star Lilies 14” x 16”

IMG_0987

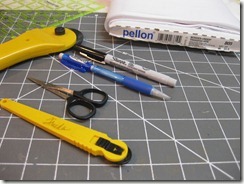
These are the basic tools I use to create my fused quilts. Wonder Under #805 from Pellon, rotary cutters, very sharp embroidery scissors and a mechanical pencil and extra fine sharpie marker.

I have used three different color gradations in this pattern, a lime to violet 1/2 yard piece of fabric that will be divided in half for the background and border. A skinny quarter yard gradation from orange to fuchsia for the flowers. And a skinny eight yard of blue to green for the leaves. I always fuse all my fabrics and then work from all the fused fabric, rather than constantly applying fusible to different areas of the fabric. And yes I have lots of fused scraps but I use them up.
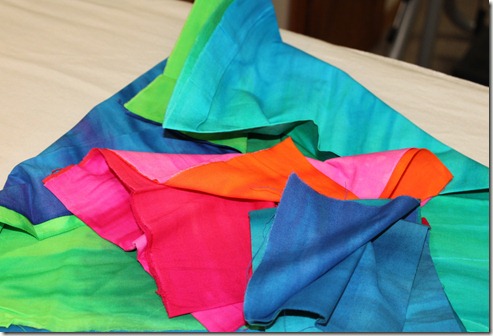
IMG_1784

IMG_1715_thumb6

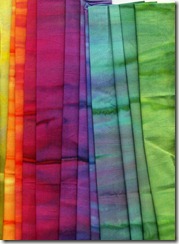
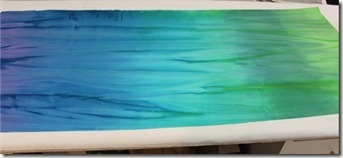
Start with beautifully ironed, wrinkle free fabric. This gradation from violet to lime will act as the background and borders for my little quilt. This is a 1/2 yard of fabric. The way I dye fabric it leaves color lines in the fabric and to me it looks like the fabric has been created by water coloring it. Gorgeous isn’t it, I love working with these gradations and color blends, they add so much depth and movement to my work.
IMG_1716_thumb

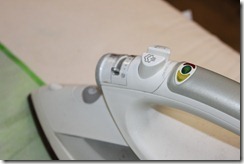
I am applying the WonderUnder #805 to the back side of the fabric (with dyed fabric there really is no back side of the fabric) notice the steam is turned OFF on my iron.
IMG_1717_thumb

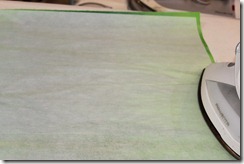
I always make sure that my WonderUnder is cut so it is smaller than my fabric. I don’t want any edges of fusible sticking out to get sticky stuff on my ironing surface. I’m going to talk about cleaning your iron in another post.
IMG_1718_thumb

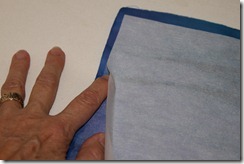
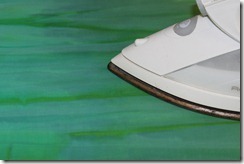
I iron all my edges really well on the back side and then turn it over to the front and iron it flat from that side too. If you have a steam iron sometimes it can leave air bubbles on the front of the fabric, just iron them out on the front of the fabric.

TIP -When I am ironing I push down on the iron and apply pressure as I go to help the fusing process.

Then let the fabric cool, go to the bathroom or something, give it a rest already.
IMG_1720_thumb

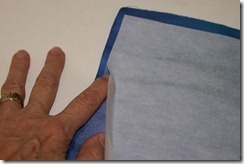
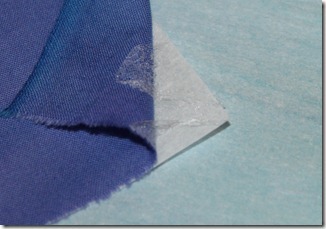
When I go to peel up the paper, I start at one end and run my finger down the length of the paper to separate it from the fabric. My good bud Laura taught me this trick.
IMG_1719_thumb3

If when you are removing the paper from the fused fabric and the fusible starts to peel up with the paper you didn’t get the fusible hot enough. Go back with the iron and heat it again, AND let it rest again. Patience is a virtue.

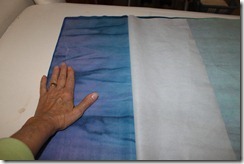
I am going to peel off the release paper from the half yard of my gradated hand dyed fabric. I will save the paper, this is what is called release paper.

TIP -I almost ALWAYS work without paper on my fused fabrics so I will get clean crisp cuts that stay that way.

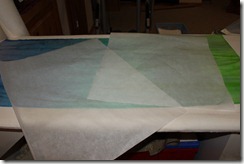
I am going to cut the release paper into two sections and use them for two different purposes. When I peel it back if I place one hand on the left and use the other hand to basically roll the paper back it should peel away very nicely. Especially if I have let the fused fabric rest.
IMG_1721_thumbIMG_1723_thumb

I will use each section of paper for different things.

The first thing I do is cut out my background area fabric. I will cut from the lime and green end of the 1/2 yard of fabric a piece of fabric about an inch bigger than the finished piece quilt, so about 15” x 17”, and place it back onto a piece of release paper. I tack fuse it to the paper. Tack fusing is lightly ironing it so it stays put on the paper. I can refuse to the release paper or parchment paper over and over again and it doesn’t matter which side of the paper I use.

image_thumb[5]image_thumb[6]

I want to draw with a pencil the exact size of the background on my fabric. I will use this as a guide later when I add in the border. I will set aside the other half of the hand dyed fused fabric from this half yard and use it later to do several things.
IMG_1737

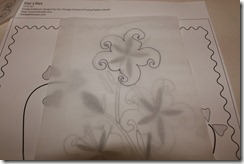
I place the other half of release paper over my pattern and using either a mechanical pencil or a black extra fine sharpie marker I am going to trace my design elements. I use a mechanical pencil when this tracing will be placed on light colored fabrics like yellow, pink or pastels and I use the marker when it will be placed on blues, greens, browns or dark colored fabrics.
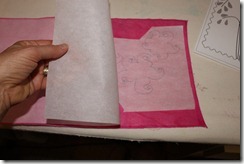
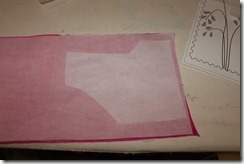
IMG_1739IMG_1741

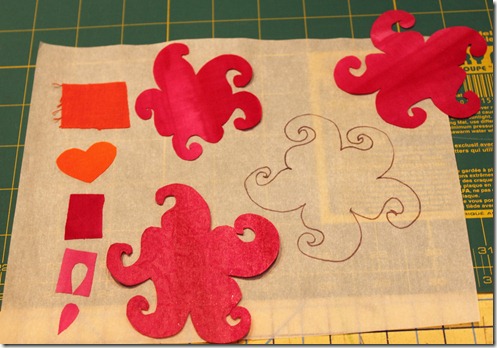
I have used a piece of fabric for all the flowers in this pattern that grades from fuchsia to orange. I fused this piece of fabric and then I will peel up the release paper on one end but leave it in place. I will place the tracing of the star lilies marker side against fused side of the fabric. I have rough cut out three star lily shapes and I want to protect my iron from getting fusible on it. So I let the release paper fall back in place and then press again with a hot dry iron. The marker or pencil will PRINT to the back side of the fused fabric. Ta Da, It’s a miracle. When it has cooled I will peel away the paper and cut right on or just inside the marker line to cut out my designs.

I repeat this process for all my design elements that I want to trace.
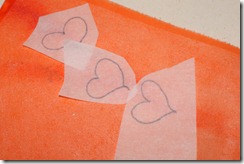
IMG_1743

IMG_1773

When I cut out shapes like the hearts or buds rather than tracing these small pieces I free form cut them. First I cut out a square a bit larger than the final shape and then with my sharp embroidery scissors I can cut out my little shapes.

As I cut out design elements like the flower heads and the hearts for the vines I can lay them on top of the background fabric.

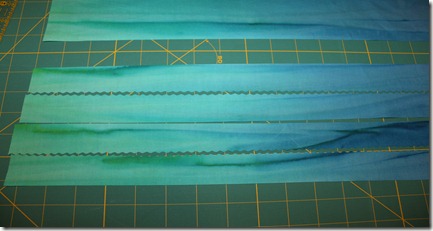
Next I want to make the stems and leaves for the flowers. I will use the other half of the gradated fabric, the blue to aqua end, to create these. The first thing I want to do before cutting out leaves and stems is to cut out the binding for this project. It comes from the aqua to blue end of the fabric and I want to make sure I have it cut and set aside before I cut the leaves and stems from the rest of this piece of fabric.
IMG_1727

I love using decorative rotary blades in my fused projects and will use two or three different ones in one project. I have used the pinking blade in my 45 ml rotary cutter to cut out the binding for this quilt. These measure 1 1/4” x 18” each. I drape them over a chair to keep them safe and un-creased.

Now I will cut out stems and leaves.

The first thing I do is cut out my stems, I do these first so that I get my long thin pieces out of the fabric before I start cutting out the leaf shapes. I am going to use a straight blade and a decorative blade to do this.

The first stems for the flower itself are cut using my straight blade and a ruler. These are about 1/4” wide. The stems for the hearts and buds are cut using a wavy blade in my rotary cutter.

TIP- I keep all my decorative blades in their own handles. You will use these fun blades a lot more if you have them already in their own handles.
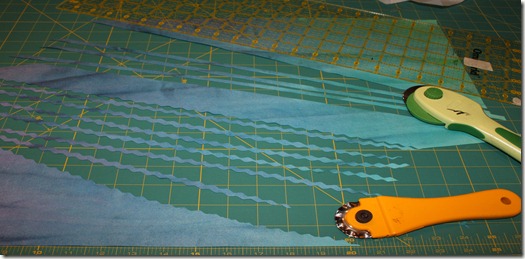
 

IMG_1731

When I cut long skinny stems and veins etc I cut these on the bias. This keeps the edges from fraying and allows me to curve them when I fuse them in place.

TIP - When using decorative blades always use an old cutting mat or turn your mat over to the back side because the decorative blades can scar your mat.
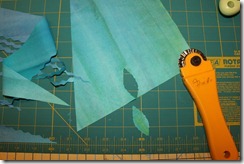
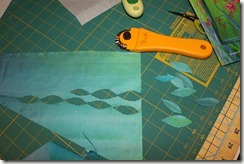
IMG_1734IMG_1735

Then with the rest of that piece of fabric I free form cut out my leaves using a deckle blade in the rotary cutter. Of course you can cut all these things with just a straight blade. I try to cut as much as I can with my rotary cutters rather than scissors because I will get cleaner smoother cuts that will stay that way.

There is one more piece of fabric in the fabric kit with this pattern. It is a dark blue to green gradation for the border. I fuse this fabric and remove the release paper and cut four strips that are 2” x 18” to add the border on this quilt. I used the wavy blade in my rotary cutter to make these cuts. Again I did this on the back side or on an old cutting mat. I just keep this old green mat on the surface of my work table over my other larger cutting mat because I use decorative blades so often in my work.
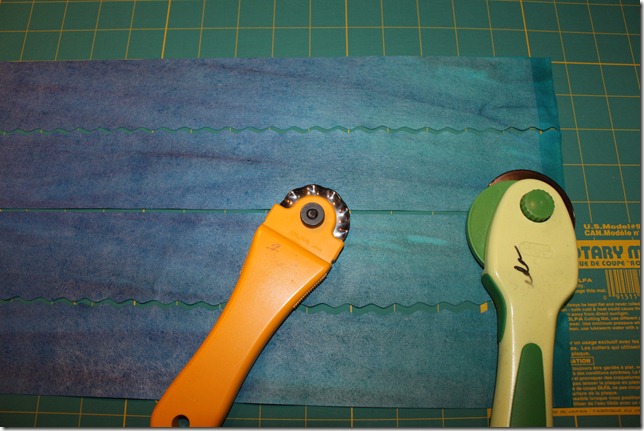
IMG_1730

Next time we will assemble the quilt and quilt it.
Monday, September 26, 2011

Basic Fusing

6 comments

Recently on this blog I asked for input from you readers. What I heard from several people was I should do more demo’s with more pictures, talk about inspiration and just share more and have lengthier posts.

So here we go, I have turned over a new leaf and will be posting more pictures, demo’s videos and of course pictures of George.

IMG_0078

Let’s talk about basic fusing.

I have found out several things over the 30 years that I have been using fusible web. I have had some ups and downs but over all I love the process and the products that I use. I am a faculty member of the Chicago School of Fusing - dean of technology, I help people with their computers, printers, sewing machines, irons, if it is a machine I help them. I really think I could have been a mechanical engineer, well except for the math part.

FUSING BASICS 101

Using WonderUnder #805 here are some of my top tips -

***1. Pre wash all your fabrics. Commercial, store bought fabrics that is, have at least starch on them if not more stuff, so you need to wash them before you put them in your stash. If you want fusible to stick to ithe fabric WASH it to get all the chemicals and things off the fabric. The fusible will stick to it and then to the other fabric you fuse it to so much better if the fabrics are clear of all chemicals. VERY IMPORTANT tip.***

2. OR just use my hand dyed fabrics they come PRE washed. The thing that I do is RAW edge fusing. Which means that I don’t do anything to finish the edges like satin stitch.  When using commercial fabrics a little white line shows on the cut edge of the fabric, but with hand dyed fabrics or batiks there is no white line because the colors go all the way through to the back of the fabric, they are not just printed on top they are dyed through and through. This is just one of the reasons I like to use my hand dyed fabrics, the other reason of course is that I ADORE saturated color and my hand dyed gradations are saturated with gorgeous color and color combinations, can you tell?

Pim0001

3.Steam your fabrics to remove all the wrinkles and then turn the steam OFF. You will not use steam again until the end of your project.

4. Use a hot dry iron to apply the fusible web to the back side of the fabric. I keep my iron on HOT and leave it there.

image

Some body always asks me in class or at a lecture why their fusible didn’t stick to their fabric.

The two main reasons are 1.They are not pre washing the fabric and 2. they are not using a hot enough iron. Fusible web is an adhesive that gets sticky when you heat it up and it has to heat up to HOT to get sticky and stick to the back of the fabric.

5. Let the fusible solidify and cool down before you remove the paper. I also cut my fused fabric without the paper on it. You’ll see in the demo, next time on Star Lilies. The reason I do this is to get a clean crisp edge when I cut out my designs. With the paper removed the edges stay clean and crisp, in fact people often say to me “Is this turned applique?” and I answer them very politely NO.

IMG_1720

6. You can use parchment paper, the stuff you bake on, remember baking, instead of release paper. Release paper is the paper that comes off of the fused fabric, or what the fusible sits on before you apply it to your fabric. I only use WonderUnder #805 it is my favorite and preferred fusible and it comes with release paper. I use the release paper in many ways while I am working with fused fabrics.

IMG_0560

I’m going to share with you next time one of my fused patterns -“Star Lilies” and the inspiration for making it.

By the way Sewmuchtodo won the step gradation from Thankful Thursday. Send me your address and I’ll put it in the mail to you this week. YEA!!!

Saturday, September 24, 2011

Why do I love fabric?

1 comments
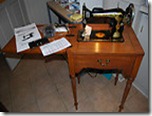
I have been a sewer all my life. OKAY, maybe not ALL my life but since I was about 7 or 8 years old. My maternal grandmother was a beautiful seamstress and she made lots of cloths and things for my sister and I while we were growing up. Of course my mom can’t sew a stitch. BUT she did own an old singer sewing machine and my sister and I started making things as soon as she let us use it, which was when I was about 7 or 8.  I wish I still had that machine. It looked like this one.
140(1)
Anyway I have a love affair with fabric. I still collect several different kinds of printed fabric. I love batiks and fabrics from Marimekko as well as wools and silks.
I love dying fabric. I love the process and I can hardly wait to see what the fabric will look like when it is all washed and pressed. Ironing is such a soothing activity. Go ahead call me nuts, but I enjoy pressing the wrinkles out of the fabric.
I think the reason why I love fabric so much is that it presents endless possibilities. You can make it into almost anything. That seems like a gift to me.
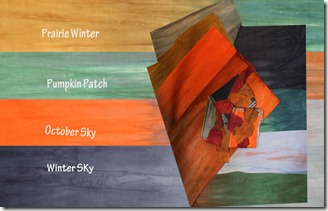
Fallmedley
My special this month on the website is a gift to you. Four long quarter yards of four new color gradations called Fall Medley.
Winter Sky, October Sky, Pumpkin Patch and Prairie Winter. You should treat yourself. George never hesitates to treat himself to a new color.
 

Friday, September 23, 2011

Fabric to Dye For

1 comments
Have you wanted to play with color?
049
Would you like to learn how to begin to dye fabric?
033
Do you wonder where and how and what you need?
022
Now you can find out. I will be teaching basic dyeing gradation at the new and wonderful Wisconsin Quilt Museum in Cedarberg, WI this October on Saturday the 15th. Contact Johanna Fritz at 
WisFritz4@yahoo.com to sign up for class.

FLOODED WITH COLOR

FRIEDA ANDERSON

Saturday, October 15, 2011
10-4
Wisconsin Quilt Museum (Cedarburg)
In this workshop, participants will learn the techniques and dye formulas of 24 shades, introducing the flood of color that can be achieved with this easy dyeing method. More information on this class will be given at the September meeting.
The cost of the class is $65.00 for members, $75.00 for non-members. This fee includes a kit with all the materials and dye-ready fabric needed for the class (required of all participants). Class size is limited to 26.
Please note: the workshop will be open to non-member registration beginning September 17. The last date of the member-exclusive registration period is Friday, September 16.
Download the supply list (PDF) for this class.


Everyone needs a little color!

You can check out how much fun Linda Tuefel and her friend Vicki had dyeing with my book. Linda blogged about it.

Thursday, September 22, 2011

Thankful Thursday

7 comments

Fall colors - who doesn't love fall. It is my FAVORITE season. The weather starts to turn crisp, the colors start to change and it leads to a wonderful 3 months full of holidays. Prairie Winter, Pumpkin Patch, October Sky, and Winter Sky are my new fall fabric gradations. They are priced at $22 a yard. You can also get a nice little sampler of four thin quarters for $22.

I am thankful today for the fall weather. And the blogger who gives me the best tip on how I can improve my blog will win this five step gradation in purples, a $30 value.  5 fat quarters of five different shades of purple. A fiver for free. Let me hear your comments. Let the improvement begin.


Print this page